Creating A New Receipt
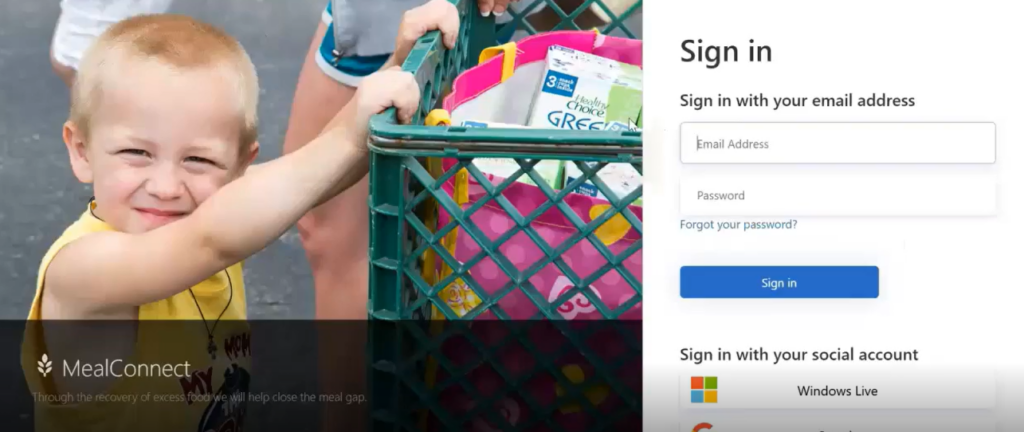
Sign In to Your Account
Login to mealconnect.org to sign in to your MealConnect account.
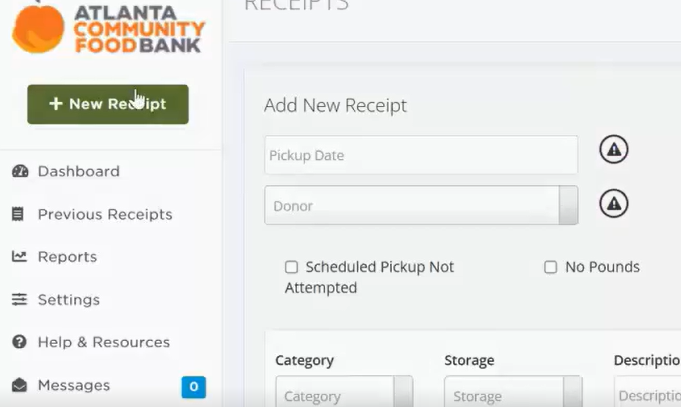
You can start entering a new receipt or click ‘New Receipt’ to get started.
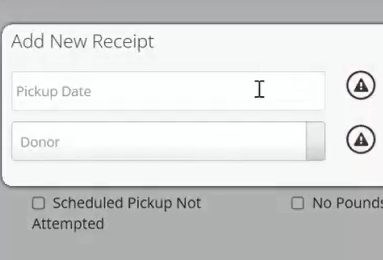
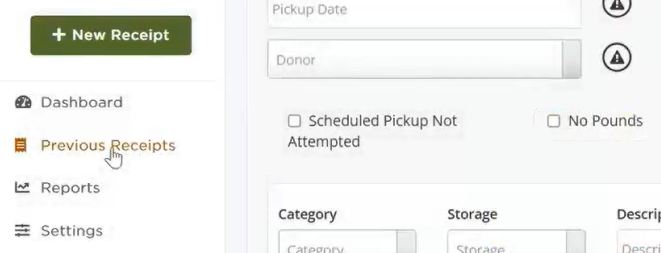
Begin by adding the date and store of your pickup.
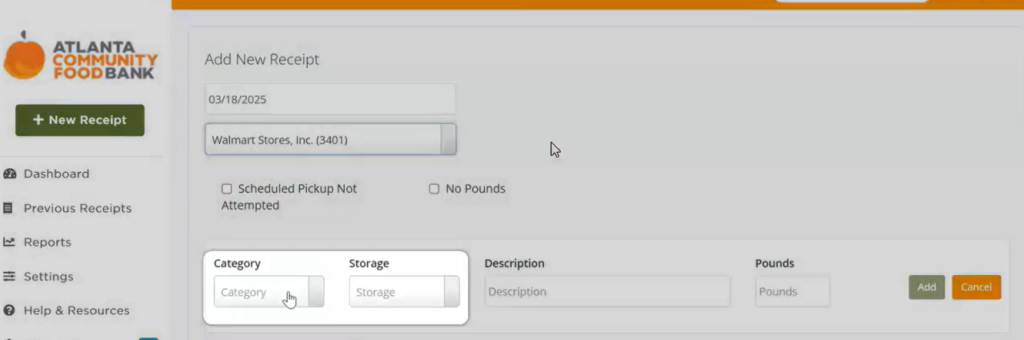
Select one of the eight donation categories.
Storage will automatically populate each category.
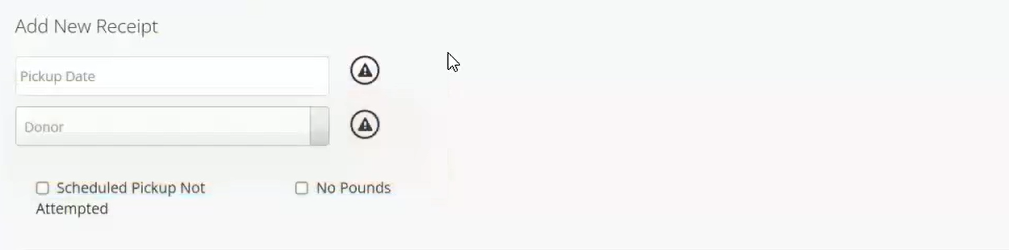
If you did NOT pick up on a schedule day, select ‘Scheduled Pickup Not Attempted’. Select a reason and click ‘Add Receipt and Review’.
If there was no donation on pickup day, select ‘No Pounds’ and list a reason. Then, click ‘Add Receipt and Review’.
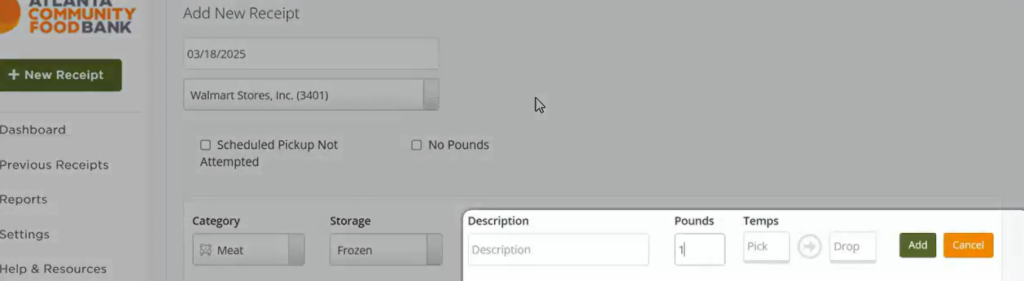
Fill in the description of the product, total weight, and temperatures at store pickup and arrival at agency. Following completion, select add.
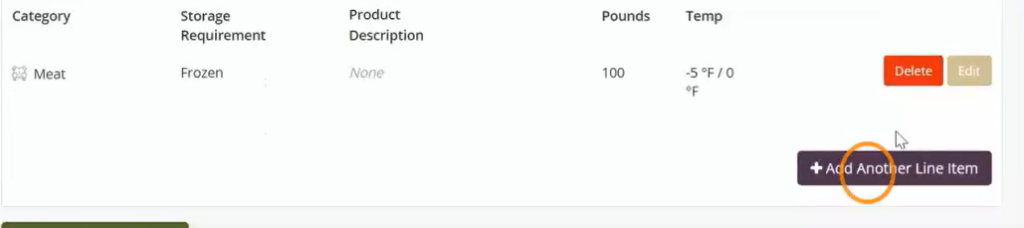
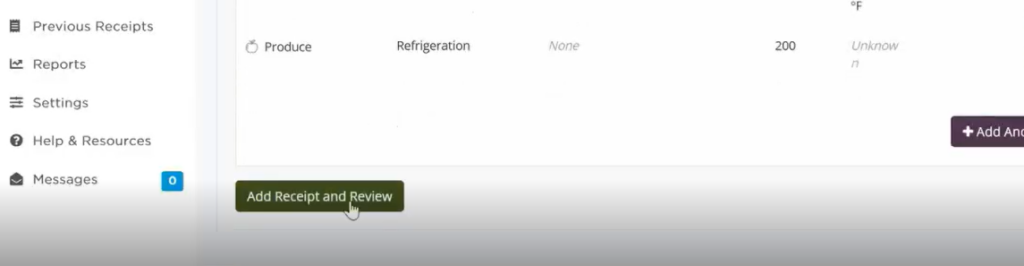
Add report weights for all the categories you have received from the store. Once you have added all categories, click ‘Add Receipt and Review’.
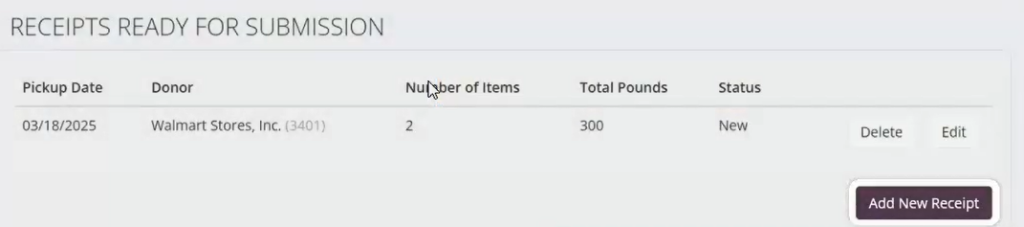
You can add receipts for multiple stores/pickups at one time.
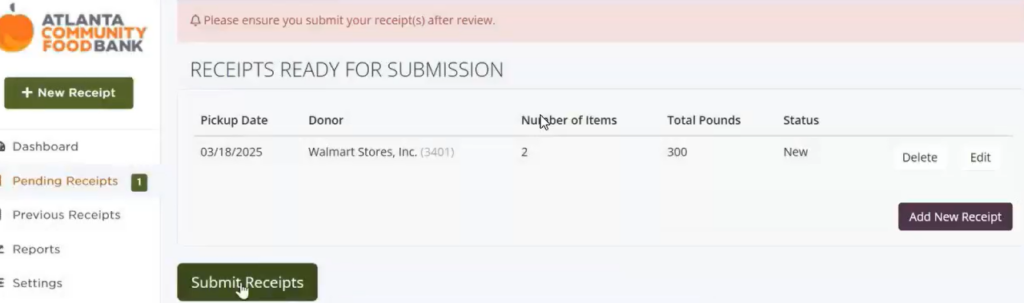
Be sure to click on ‘Submit Receipts’ once you are done.
View Previous Receipts
You can view and edit your submitted receipts at any time.